Mar 08 2010

Biological Infections in Diesel Fuel . . . and Biocide

Published by under Boat Maintenance

Here is a brilliant discussion of biological infections in diesel fuel and the use of biocide and tank cleaning methods to cure your system.  It includes all of the science and safe practices to accomplish the cleaning of your tank.

http://sail-delmarva.blogspot.com/p/diesel-biocides.html

No responses yet

Jan 22 2010

Marishanna has a clean bottom . . . .

Published by under Boat Maintenance,Wylie 39

You may not be able to tell, but Marishanna has a clean bottom.  I have been keeping fairly current with it–scrubbing the waterline, and softly sponging the underwater paint, but the other day, I noticed that there was only one zinc left on the prop shaft, and that it was nearly gone.  So, I hired a diver to come out and professionally clean the bottom of Marishanna, replace the zincs, and even coughed up a bit extra to have him scrub the bottom of the dinghy.

Zincs are metal attached to the boat that is lower on the chart of elements that all the other metals on-board.  If you have an electrical system, you have magnetic fields, and when you mix a magnetic field with sea water, it needs some place to go.  On boats, you put zincs and give this process something “to eat”–so, that the process will leave your brass, stainless steel, and other metals alone.  It is sort of a boat owner’s offering, if you will.

Once they are gone, your boat vitals are eroding (like the thru-hulls can be made of metal).  So, it is important to keep them replaced and current.  And, Marishanna’s zincs have been renewed–a fresh offering to the god of electrolysis.

Note: They really call them “Sacrificial Anodes

No responses yet

Jan 20 2010

To Repair a Dinghy

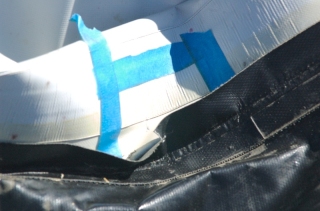
Not everything about sailing is fun, although even the not-so-fun parts can be fun with the right mindset. That is what I kept telling myself through the whole process of repairing the dinghy. The poor little guy had been ferrying us sailors, first the four of us, and now myself, to and from the marina, onto beaches, through crashing surf for weeks and finally, one of his seams let loose.

It came as sort of an emergency. I awoke and was taking my morning survey of what happened while I was sleeping, and heard a loud hiss coming from the dinghy tied to the stern. Even in my groggy state, warning signals blared the full “A-OOOOOGH-A” and raised a general alarm. A 65-pound motor sits on the back of that dinghy, and that hissing noise meant that if I did not do something right away, there might be the opportunity to recover both the dinghy and that motor from the ocean floor . . . .
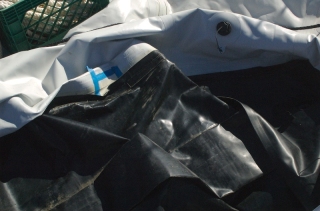
So, first things first: a quick moment of thought and planning. A big hole would make a “whoosh”–this was a “hiss” and a relatively small hole and most likely only on one side (the two tubes are separate). I would have at least 30 – 45 minutes to resolve this. The biggest problem is getting the 65-pound motor onto the boat–up to my chest when I stand in the dinghy. Was there some mechanical advantage I could use? For example, could I rig a sling and use the end of the boom or a masthead halyard to hoist it up?

I could do all of those things, if I had planned for it. Right now, I would simply have to lift it up and plop the motor on its side on the deck. The longer this process takes, the less air that would be in the dinghy, and the harder this whole thing is going to be. And, with that, the planning phase officially ended.

Cut away the tape that keeps the lifeline gates closed, and open the gate on the port side. Unhook the gas can and put all of the miscellaneous dinghy stuff onto the sailboat. Start the motor without the gas can attached–to burn all of the remaining gas in the engine. (It will be a few days, and gasoline sitting inside the motor will rot out the internals of a motor.) Unscrew the motor clamps, heave, and . . . before I knew it, the motor was already sitting on the deck. Another heave, and the dinghy was sitting on the foredeck, too–already folding awkwardly like a partially-deflated beach toy.

The repair process was not so bad. It took a day for the dinghy to dry out (and for me to scrape the creepy-crawlies off the bottom). It took another day or so for me to select the right dinghy repair kit from the local chandleries. It seems that there is really no in-between when it comes to these kits. There are the cheap “patches” that should actually be used for your partially-deflated beach toy, and then full-blown, serious dinghy repair kits with two-part glues, etc. I opted for the latter because I do not want to spend my time down here repairing dinghies. Do it once, do it right, and get on with your trip . . . .
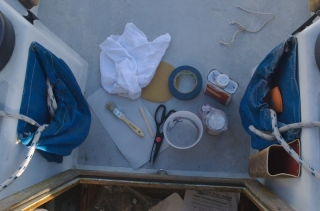
I cleaned the surface of the dinghy to be repaired with acetone, cut the patch to the correct size, and mixed a portion of the two-part glue. Taped around the area for the patch, painted the surface, let dry for 5 minutes, applied the patch, press really hard for a few minutes, and then clean up the excess glue–while it is still wet. And, then wait . . . for 24 whole hours. All of the remaining glue got used to lovingly coat the seams that had started to pull open in places from the years of use.

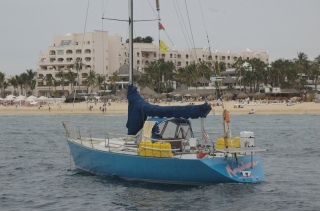
I waited the full day, reversed the get-the-dinghy-out-of-the-water process, and was free, once again, to dinghy away from the sailboat–unfettered by the cares of the world (with the exception of that big wave threatening to splash you).
2 responses so far

Jun 25 2008

Dinghy Maintenance: Repairing the Cal Sailing Club Dinghy Carnage

Last weekend, the Cal Sailing Club hosted an intensive sailing workshop.  As a result, there were more than a few casualties to the fleet of dinghys, and I swung by the club to help repair them last night.

The club has 5 Laser Bahia’s with a tiny Gennaker sail, a roller furling jib, and little square-top main sail (with reefing points).  They are cute little boats, pretty fast, and really popular.

I spent a couple of hours last night swapping out shackles, fitting cotter pins, and taping sharp things (that could catch wetsuits, cut hands, etc.).  Some of the other volunteers were working on different portions of the same boats.  Towards the end of the evening, we replaced two of the repaired rudders, and the bulk of the mini-fleet of Bahias were back into operation.

This was excellent fun–almost therapeutic.  Working on something, fixing something that was broken, and improving on designs with new ideas. And, then to have the product of your labors be seaworthy afterwards.

Great fun.

No responses yet

Jun 24 2008

Marina Step Stool Maintenance: Sturdy and Slip-free

Published by under Boat Maintenance

The step stool to get from the Ericson 29 to shore was made of fiberglass, and quite frankly, a bit wobbly.  Also, when it was wet, I would often step straight to the dock.  Unless I was wearing boat shoes, fiberglass and water meant that I might slip.  Last year, a long-time sailor slipped in-transit from dock to her boat, hit her head and drowned quietly in the water.  So, I am a bit mindful.

Step 1: Make it sturdy

step_stool2.jpg

I looked underneath to determine why there was wobble in the stool.  Quite simply, there was no reinforcement.  Thin fiberglass was cast in this shape–and, the sides were not thick enough to have any resistance.

  1. From Home Depot, I purchased a single 2×4 fence stud.  It was $1.99.
  2. I measured across the bottom of the step stool–21 1/4 inches.  With the circular saw, I cut 2 pieces to that exact length.
  3. With the drill, I pre-drilled the holes through the fiberglass.  The wood on the 2×4 was really wet and I knew the screws would grab hold.
  4. Put the 2×4 into place, screwed the brass deck screws into place and voila!  The step stool was instantly more sturdy.

Step 2: Clean and Apply Grip Tape for No More Slipping

step_stool1.jpg This part was easy.  Using rubbing alcohol, I cleaned and cleaned and cleaned it.  The dirt came off onto the rag, the rubbing alcohol evaporated away, and the surface was clean.

Afterwards, I applied 2 2-inch strips of non-slip tape to the step stool on both steps.

Project Totals

  • $1.99 – Pine 2×4 stud
  • $0.50 – 8 1 1/2″ deck screws
  • $0.99 – Rubbing alcohol
  • $5.99 – 2″ Non-slip tape
  • 30 minutes of my time

No responses yet

Jun 19 2008

Ericson 29: Diving the Bottom

barnacle.jpgIt is TIME to have the bottom cleaned on the Ericson 29 again. In fact, the last time the bottom was cleaned was about 9 months ago. I am actually behind schedule.

The condition of the algae on the bottom actually determines the time more than anything. And, it is definitely time. As seen in the image, there is an entire bustling community of crustaceans living and working on the hull. Not exactly desirable for good hull speed.

I must call the diver to come and clean the bottom of the boat. More importantly, a haul-out and new bottom paint has to happen soon.

No responses yet

May 20 2008

Ericson 29 Todo List

There are quite a few things to do before the Ericson will ready . . . but, that is part of the reason why I purchased the boat.  Overall, it is sturdy boat, but it is going to be my textbook for learning how to work on and repair boats.

The todo list is divided into several categories.  There are things that must be done before she can be sailed, things that are routine maintenance, and things that are upgrades.  Here is the first draft:

Before Sailed Items:

  • bottom wet-sanded and new bottom paint applied
  • prop replaced (it was partly eroded due to worn zincs)
  • motor tune-up and any repair completed
  • anchors inspected, and rode replaced
  • chain plates replaced
  • standing rigging replaced
  • running rigging replaced
  • electrical system inspected, tested, and any repairs completed
  • life-lines replaced

Should be completed:

  • portholes and deck hardware rebedded
  • cabin-top replaced
  • hand-rail replaced
  • winches disassembled, cleaned, and reassembled
  • running rigging replaced
  • docking lines and fenders replaced

Upgrades:

  • replace seat cushions
  • purchase additional life vests for guests
  • repair/replace canvas covers
  • add canvas dodger
  • paint top-sides
  • install mast ring at the base of the mast
  • lead all lines aft
  • upgrade main winches and move existing winches to the cabin-top

This is not exactly a short list, but it is worthwhile.  This is a pretty extensive textbook . . . .

No responses yet

May 09 2008

Weekend Reading

Cover of \"The Splicing Handbook\"This weekend, we are going on a little roadtrip, and I am going to take along a little reading.

I bought “The Splicing Handbook” at West Marine last month, and expect it to be invaluable reading.  I have three old boats and they ALL need their lines replaced.

Perhaps, I am most excited about making a peel strop, and correctly splicing the metal wire into the rope halyards–old boats can be so much fun.  On the Ericson, I am going to replace the shivs at the masthead so that I can use all line and no wire in the halyards.  On the other boats, however, I am going to just let them be as they were . . .

I’ll give a full review after I have read the book.

No responses yet