Archive for the 'Boat Maintenance' Category

Aug 02 2010

Diesel Filters are On Order

Published by under Boat Maintenance,Wylie 39

The fuel dock found the Primary Diesel Filters!  They are being shipped from Bakersfield–the Universal Diesel motor on the boat is a marinized version of a Kubota tractor motor–which explains why the filters are in land-locked Bakersfield.  They should be here on Wednesday!

Not much, but that is what I call progress!

No responses yet

Aug 01 2010

Sunny Santa Barbara (and How I Got Here)

One more week and I’ll be home–back in San Francisco.

Saturday, 24 July 2010

Last Saturday, I left San Diego, rounded Point Loma and sailed up to Mission Bay. There is a beautiful inner harbor for transient boats that has a flat, sandy bottom and well-protected and calm. You can see the Sea World tower from inside–and, watch the fireworks. I anchored in there for the night, and left in the middle of the night to reach Dana Point the next morning.

Sunday, 25 July 2010

The sail to Dana Point was nice and easy, but when I arrived, I was exhausted. I think the 6 weeks at sea is finally taking its toll. Inside Dana Point is another protected anchorage, and I dropped the hook in 25 feet of water–in what has to be the calmest place I have ever been. It was even more peaceful than being tied up to a dock. The downside is that someone has to stay aboard at all times, and being a single-hander, that someone was me. I quickly fell asleep and slept through the night until the next morning.

Monday, 25 July 2010

After a nice breakfast, I pulled the anchor and sailed on a lovely broad-reach the short trip to Catalina. My first inclination was to skip Avalon, and sail up to Goat Harbor and drop the hook. So, I continued onwards and up Catalina. Around 5pm, as I was approaching Goat Harbor, the wind shifted so that it was out of the lee of the island, and I got blasted by 25 knots of wind. I put in a reef in the main, but with the auto-pilot faltering, it still couldn’t hold a course with any sail up at all. Despite all of the sleep from the previous night, I was still exhausted, so I turned around (and sailed WITH the wind for the first time in 1100 miles), and ended up back at Avalon.

In Avalon, I contacted the Harbor Master’s office, and rented a mooring ball for the night. They were out of space in the inner harbor, but had room in the outer harbor. They have the boats packed so tightly together that you moor both the bow and the stern! As soon as the boat was on the mooring ball, I was out. It was very rolly on the outside, but I was exhausted, and slept easily.

Tuesday, 26 July 2010

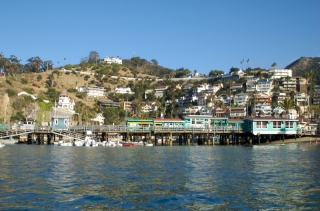
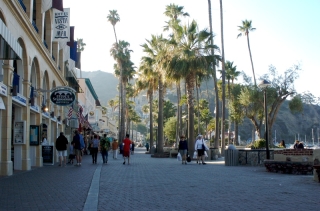
I awoke kinda late, but was excited to see the mythical city of Avalon. 😉 So, I inflated the dinghy. It was too rolly to put the motor on, so I grabbed the oars and rowed into town looking for a shower and some food. And, WOW–what a town. Nestled on that beautiful island is an incredible town. Found the showers, drank some beers and ate dinner, took some awesome pictures, and at the end of the day, went to the movies. Some time ago, they converted the Casino to a movie theatre, so I watch the one movie that was playing–Inception. Popcorn, soda and the movies. I loved it.

A brisk row back to the boat and I was sacked out.

Wednesday, 27 July 2010

In Catalina, you have to be off the mooring ball by 9am. So, around 0845, I was motoring out to sea, and heading up the coast. The weather was supposed to be pretty typical–10 – 15 knot winds during the day building to 15 – 20 knot winds. I sailed past Two Harbors and all the way to the North-Western tip of the island, and set the hook in a small bight and slept.

Thursday, 28 July 2010

Around 9pm, I weighed anchor and headed off to sea. I made great time and an easy, overnight passage up to the Northern Channel Islands. By sunrise, I had passed Anacapa Island and reached the Eastern edge of Santa Cruz Island. And, what an island! I cannot wait to return and take a few days to explore this island. There are tall cliffs that rise out of the deep water, birds circling in the air, and dozens of picturesque bights where you can tuck your boat away for some rest. It was impressive.

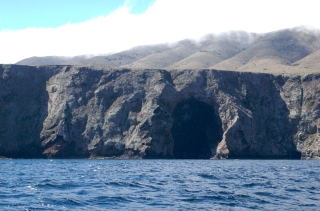
I continued around the North side of the island to see Painted Cave–a 1200-foot ocean cave (supposed to be the largest in the world), and continued to enjoy the lovely conditions. By 8:30am, the wind had picked up dramatically–despite the forecast predicting it would happen around 1pm. Once the winds freshened to a steady 30 knots, the auto-pilot could no longer hold the sail.

There was another little problem . . . . On Marishanna, we have the SSB radio using the center section of the backstay as an antennae. You put an isolator on the backstay at the top, and at the bottom of the section to be used, and then run the antennae cable up to the section and attach it with a hose clamp. Well . . . the tape wrapped around the clamp has come loose, and the runners caught it–and, they like to catch it, rather than merely whisking off of it. I can clear it with a boat hook, but until I can get the tape re-wrapped, it is something else that requires attention.

So, faced with a failing auto-pilot, +30 knot winds, and runner complications, I decided to drop the mainsail and lash it to the boom. According to the map, I had to round the far Western point and cross the channel to get to the North Eastern anchorage on Santa Rosa Island. I proceeded around the final point and started into the channel and the waves built to 2-meter waves with a frequency of about 3 seconds. Without the sail up, Marishanna and I were getting hammered.

About 15 minutes into the final stretch (about 8 miles left–I could see the anchorage), the engine sputtered and coughed and died. To summarize: no mainsail, failing/failed autopilot (not able to keep the nose into the wind for me to get the sails back up), engine died, being blown into a lee shore, winds gusting to 35 knots, and 6-foot waves every 3 seconds.

Unable to leave the helm, I started the motor again, and with a little logic, determined that as the engine started to sputter and die, I could press the Preheat button and it would fill the cylinders with diesel and the engine would continue to run. I knew there was fuel in the tanks–and, hoped that this temporary solution would work to get me out of the lee shore, and immediate danger–which it did.

There was a protected anchorage close (just behind the visible rocks), but I had not reviewed that anchorage any more than a cursory review–and, I thought I remembered some underwater rocks (which was probably why I did not select it in the first place). Unable to leave the helm and review the charts, I chose to try to run across the channel the final 8 miles to the original anchorage. I had already reviewed the charts and knew that it was an easy entrance, no underwater obstructions, protected, and 4 – 6 fathom sand-bottom. If at some point, the engine died altogether, I would be in the center of the channel and could run with the wind and have 30 – 40 miles of clear seaway–plenty of time to improvise, repair, set out a drogue, etc.

Thankfully, my luck held, and I was able to manipulate the iron jenny to get me all the way to the anchorage. Once there, I set the hook, and was for some reason, exhausted. 😉

Friday, 29 July 2010

After the previous days events, I scrapped the plans for the 40-mile run to Cojo Anchorage just below Point Conception, and instead, diverted to Santa Barbara for repairs. I picked up the weather information, had weighed anchor by 0545 and made an easy run, sputtering motor and all to Santa Barbara on flat, calm seas, running with 3 – 8 knots of wind. It was an easy anchor–the Santa Barbara anchorage is spacious and although windy in the afternoons, quite nice.

From my estimation, the motor problems are a fuel-related. I am going to start by changing the fuel filters–am on the hunt for new filters now. If that doesn’t resolve the problem, I will have to unseal the fuel tank and visibly inspect if something is clogging the pickup tube. If it is clean, then it has to be a problem with the lifting pump. There could be a pinhole in the lifting pump diaphragm–just large enough to weaken it from pulling fuel from the bottom of the tank (there is less gravity helping the process at the bottom of the tank than when the tank is full).

As for the backstay/runner binding issue: I have figured out that with a pair of prusik knots, I can ascend a line and get up to that clamp to get it cleaned, and re-wrapped with tape–and, no longer an issue.

As for the autopilot: There is no hope–the unit simply needs to be replaced. I’ll do a cursory search for one here in Santa Barbara, but it is most-likely a to-be-ordered part, and very expensive. Without a working autopilot, there is no way for me to sail the boat. Just to tack the boat, I would need to tack the jib sheet, tack the main sheet, change the working runner from one side to the other, AND man the helm. I simply cannot do four things simultaneously. For the last few legs, I’ll have to motor-sail Marishanna.

Exhausted and ready to be home, I’ll keep you posted . . . .
No responses yet

May 27 2010

Mario’s

Mario's

This unassuming storefront may not look like much, but this is Mario’s. And, they just saved me $20 US on the bilge pump. They also had great prices on a new zinc, a replacement lure for the one that was attached to a huge fish, and other bottom cleaning goodies!

Thanks Mario!!!

No responses yet

May 26 2010

More delays

As I was completing my final check of the boat, I discovered that the bilge pump is not functioning properly and must be replaced.

Fortunately, the local chandlery has a replacement bilge pump.

I should have the repairs completed tomorrow and have my eye on a new window of mild winds that begins on Saturday . . . .

No responses yet

May 05 2010

Sailboat Heat Exchanger Problems and Repair

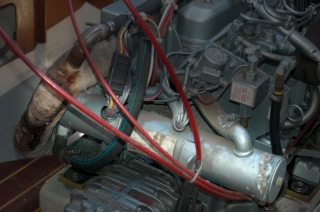
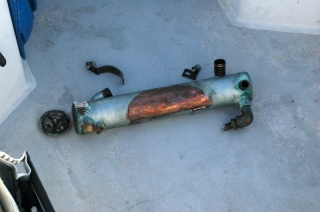
One fine day, I started the engine of the sailboat and saw the temperature continue to rise–rather than holding at its normal low temperature.  Upon further inspection, there was about a gallon of lovely, green anti-freeze sloshing around in the bilge–and, the culprit was the heat exchanger.

Cooling on a sailboat (or powerboat) is a bit different than your car, but the principle is the same.  Sea water is too rough and has too many particulates to circulate through the machined parts of your motor (plus salt water electrolysis can eat away internal parts of the motor), so a closed system with freshwater is used.  This is exactly like your car.  The systems on sailboats even use anti-freeze to raise the freshwater boiling point to a higher temperature because–well, boiling water (steam) isn’t going to keep your engine cool.

The main difference between the two systems is that instead of a car radiator with its hundreds of internal cooling fins that uses fresh air from the car fan to decrease the temperature, a sailboat has a heat exchanger.  This little device has a series of tubes, and it runs sea water through some of them and fresh water through the others and heat from the fresh water is transferred to the sea water–which is then mixed with the exhaust and jettisoned out the back through the exhaust.

So, here’s the problem: at some point, the idle was set to a lower number on the motor–down to 600 RPM.  It probably happened at the boat yard during the last tune-up.  This is a normal idle for motors, but on the Universal M-25XPB.  The three-cylinder diesel shakes violently at 600 RPM.  Universal Diesel even recommends that the idle be set higher to 1100 RPM (I have since set it back to the correct settings of 1100 RPM).  All of that rattling around and vibration basically shook the fittings right off the heat exchanger–putting a pin-hole into the outer body in the process.

While it looks pretty simple and sounds pretty simple, and, in concept should BE pretty simple, there is a caveat.  A heat exchanger has a copper body, stainless steel bolts, brass water connectors, the pieces are soldered together, and even includes a pencil zinc.  It is the perfect example of what can happen when dissimilar metals are placed together (although the zinc is supposed to eradicate the electrolysis part of the equation).  I was concerned about finding someone who could do the work properly . . . .

Fortunately, one of my friends knew a metal craftsman.  We drove to his metal shop and as we were pulling in, a brand new, stainless steel swim platform/live-well combination was pulling out of the yard.  It was beautiful work and I felt better already.

The guy looked at the heat exchanger and all the pieces and said, “no problem.”  He said he would weld the brackets back together, clean everything, fix the pin-hole, solder everything back together, clean and pressure test everything–and, that it would be ready tomorrow afternoon–around 3pm.  At the time, my spanish was not good enough to negotiate the price, so my friend did it for me.  After a couple of rounds of friendly bartering, they agreed on $100. (I guess he wasn’t following the: Good work, Cheap, Fast: Pick Two” rule.)

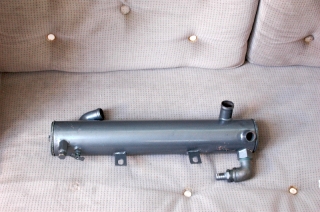
And, here is the finished result.  So beautiful, I could photograph it on the settee–even painted the exact same color as the motor–classy.  It installed in about 45 minutes, and after the usual hose tightening and air-bubble bleeding, hasn’t leaked a bit and the motor has stayed nice and cool.  And, lastly, I hand-siphoned the spilled anti-freeze from the bilge and the local boat yard recycled it for a modest fee.

No responses yet

May 04 2010

The Baja Bash (and another Beautiful Cabo San Lucas Sunrise)

It has been quite a while since I have updated the blog–but, things have gotten a bit hectic.

There was a repair to the heat exchanger on the motor, the Tsunami from the earthquake in Chile, a trip into the Sea of Cortez with friends, lots and lots of client work (that has been the consuming part), and now, the preparation for the return trip home.

That list is a bit lengthy, unfortunately, but here it is:

  • Clean the filter screen in the fuel system
  • Clean debris from the bilge pump/screens and hoses. If that does not resolve the slow pumping problem, replace. I tested it the other day, and it was pumping slowly, if at all. It has power and you can hear it working. It is certainly not pumping the 500 gph rating. If the hoses are filled with gunk, it should return to normal operation once they are cleaned. If not, it must be repalced. Gotta have a bilge pump.
  • Mount the flag holder to the first spreader (a lashing–no drilling involved), and mount the radar reflector on the standing rigging. On the sail down, we attached the reflector and our courtesy flags to a halyard, but I took them down because the rolling from the waves caused this contraption to swing back and forth–and, it was resting against the spreaders–basically sawing through the halyard.
  • Change the oil in the motor. Bought the hand pump to remove the old oil in La Paz a few weeks ago. Have the new oil aboard, and purchased a new filter at a local store.
  • Sew temporary repairs to the first reef points and rig the second reef. On the way down, the winds were 45+ knots and we had to gybe. We made it through, but the reef points tore about an inch on two of the four. I’ll use the palm and waxed thread and sew those together to keep them from ripping any more and out of their insets. I’ll certainly need to reef on the bash back to San Francisco.
  • Tie down the front netting with heavier-duty line. The netting on the bow was fixed with plastic rings, and they simply cannot endure rough conditions. I purchased some nylon line and am sewing it to the railing for a more permanent fix.
  • Clean the bottom thoroughly, and replace zincs. I finished this yesterday (with the exception of the zincs)–and, it took about 1.5 hours. The last guy I paid was a friend of a friend, and he kinda took me for a ride. “Oh, yeah, it’s CLEAN.” Perhaps we simply have different definitions of “clean.” Regardless, it is super-clean now.
  • Mop the deck with fresh water. The sand blows all the time–it is a desert down here. Time to mop the deck and get all that dirt off.
  • Purchase 2 jerry cans for water. One of the two 25 gallon water tanks sprung a leak. The best idea would be to pull it and have it repaired, but that process may be cost-prohibitive. As an alternative, 2 more jerry cans of fresh water would suppliment the two that I already have and give me 24 gallons–one gallon less than the tank, and would cost hundreds less.
  • Buy the provisions. Already made the menu and shopping list.
  • Fuel up, and top off the water tanks.
  • Wait for a good weather window.

I’ll keep you posted as to the progress. For now, please enjoy this morning’s sunrise.

No responses yet

Mar 08 2010

Biological Infections in Diesel Fuel . . . and Biocide

Published by under Boat Maintenance

Here is a brilliant discussion of biological infections in diesel fuel and the use of biocide and tank cleaning methods to cure your system.  It includes all of the science and safe practices to accomplish the cleaning of your tank.

http://sail-delmarva.blogspot.com/p/diesel-biocides.html

No responses yet

Jan 22 2010

Marishanna has a clean bottom . . . .

Published by under Boat Maintenance,Wylie 39

You may not be able to tell, but Marishanna has a clean bottom.  I have been keeping fairly current with it–scrubbing the waterline, and softly sponging the underwater paint, but the other day, I noticed that there was only one zinc left on the prop shaft, and that it was nearly gone.  So, I hired a diver to come out and professionally clean the bottom of Marishanna, replace the zincs, and even coughed up a bit extra to have him scrub the bottom of the dinghy.

Zincs are metal attached to the boat that is lower on the chart of elements that all the other metals on-board.  If you have an electrical system, you have magnetic fields, and when you mix a magnetic field with sea water, it needs some place to go.  On boats, you put zincs and give this process something “to eat”–so, that the process will leave your brass, stainless steel, and other metals alone.  It is sort of a boat owner’s offering, if you will.

Once they are gone, your boat vitals are eroding (like the thru-hulls can be made of metal).  So, it is important to keep them replaced and current.  And, Marishanna’s zincs have been renewed–a fresh offering to the god of electrolysis.

Note: They really call them “Sacrificial Anodes

No responses yet

Jan 20 2010

Head Case: Emergency Rebuild of a Marine Toilette

Quick Update: Today required an emergency rebuild of the head–the toilet on board.  The problem wasn’t terrible–the plunger pulled free from the internal parts that do the plunging.  So, the repair looked like this:

Take everything apart, clean everything with vinegar as you go, retrieve the internal plunging parts and lost nut, lubricate insides of plunging tube with waterproof grease (should be good for the season, now), put everything back together, and test that it works and doesn’t leak . . . . Simple, but time consuming.

Everything went along smoothly.  You will have to take my word for it, however, it’s just not appropriate to be posting pictures of this one . . . .  😉

No responses yet

Jan 20 2010

To Repair a Dinghy

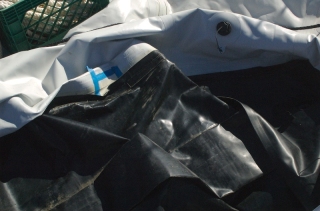
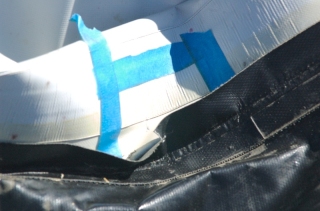
Not everything about sailing is fun, although even the not-so-fun parts can be fun with the right mindset. That is what I kept telling myself through the whole process of repairing the dinghy. The poor little guy had been ferrying us sailors, first the four of us, and now myself, to and from the marina, onto beaches, through crashing surf for weeks and finally, one of his seams let loose.

It came as sort of an emergency. I awoke and was taking my morning survey of what happened while I was sleeping, and heard a loud hiss coming from the dinghy tied to the stern. Even in my groggy state, warning signals blared the full “A-OOOOOGH-A” and raised a general alarm. A 65-pound motor sits on the back of that dinghy, and that hissing noise meant that if I did not do something right away, there might be the opportunity to recover both the dinghy and that motor from the ocean floor . . . .

So, first things first: a quick moment of thought and planning. A big hole would make a “whoosh”–this was a “hiss” and a relatively small hole and most likely only on one side (the two tubes are separate). I would have at least 30 – 45 minutes to resolve this. The biggest problem is getting the 65-pound motor onto the boat–up to my chest when I stand in the dinghy. Was there some mechanical advantage I could use? For example, could I rig a sling and use the end of the boom or a masthead halyard to hoist it up?

I could do all of those things, if I had planned for it. Right now, I would simply have to lift it up and plop the motor on its side on the deck. The longer this process takes, the less air that would be in the dinghy, and the harder this whole thing is going to be. And, with that, the planning phase officially ended.

Cut away the tape that keeps the lifeline gates closed, and open the gate on the port side. Unhook the gas can and put all of the miscellaneous dinghy stuff onto the sailboat. Start the motor without the gas can attached–to burn all of the remaining gas in the engine. (It will be a few days, and gasoline sitting inside the motor will rot out the internals of a motor.) Unscrew the motor clamps, heave, and . . . before I knew it, the motor was already sitting on the deck. Another heave, and the dinghy was sitting on the foredeck, too–already folding awkwardly like a partially-deflated beach toy.

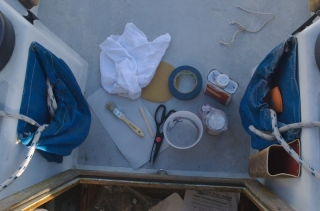
The repair process was not so bad. It took a day for the dinghy to dry out (and for me to scrape the creepy-crawlies off the bottom). It took another day or so for me to select the right dinghy repair kit from the local chandleries. It seems that there is really no in-between when it comes to these kits. There are the cheap “patches” that should actually be used for your partially-deflated beach toy, and then full-blown, serious dinghy repair kits with two-part glues, etc. I opted for the latter because I do not want to spend my time down here repairing dinghies. Do it once, do it right, and get on with your trip . . . .

I cleaned the surface of the dinghy to be repaired with acetone, cut the patch to the correct size, and mixed a portion of the two-part glue. Taped around the area for the patch, painted the surface, let dry for 5 minutes, applied the patch, press really hard for a few minutes, and then clean up the excess glue–while it is still wet. And, then wait . . . for 24 whole hours. All of the remaining glue got used to lovingly coat the seams that had started to pull open in places from the years of use.

I waited the full day, reversed the get-the-dinghy-out-of-the-water process, and was free, once again, to dinghy away from the sailboat–unfettered by the cares of the world (with the exception of that big wave threatening to splash you).

2 responses so far

Next »